Here's that tutorial I promised. I'm working on these three to finish four for my brother's Christmas present.
Warning: This is a modeling tutorial for Intermediate Modellers. I, being an intermediate modeller, may provide a finished product which you may dismiss. But practice makes perfect of course!
As a green beginner, you may struggle a lot. As an expert I'm sure you could add your own embelishments to the technique to make yours look better.
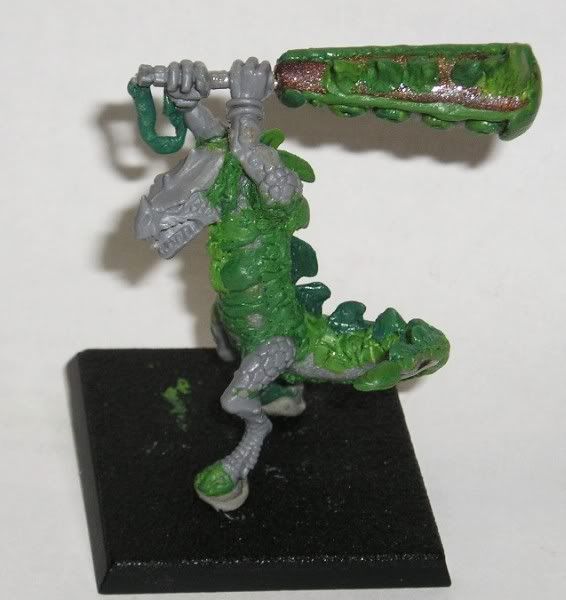
Okay, here's the thing, a lot of Lizardman players like to play Kroxigor, which isn't a surprising thing considering how kickass these guys are. Problem is, with each of them costing roughly AU$27 (that's 27 Aussie dollars), it's an expensive thing to add to your army. But there is a way to make Kroxigor which cost almost one seventh that! $4 Australian per dinosaur. And all you need is a sprue of Saurus Warriors.
Materials
You will need (makes four):
- One complete sprue of Saurus Warriors (the box of Saurus comes with both halves) which you can get through either the 16 per box, or by ordering the sprues as Bitz on the US or UK websites.
- a pin vice and set of drill heads (from GW stores)
- modeling putty (either Sculpey or Milliput)
- standard paper clips
- green stuff
- 40x40mm square bases (one per kroxigor, so 4 of them)
- hand saw
- vice, clamp, spanner, wire working tool of some variety
- blue tak
- clippers
- plastic and super glue
- parental supervision or help if you're unsure or under 16
Step One - Developing the Structure
Firstly you're going to need a crash course in unbending paperclips. Annoying at first, but once you get the hang of it, quite easy. Try to get them as straight as possible. After about 5 minutes with a wireworking tool I was as good as Bullseye (from Daredevil) at unbending paperclips.
Now use some wirecutters or other such things to clip the paperclip. It should be about 7.5-8.5cm long, but you should decide on how long, and make all your kroxigor that exact length.
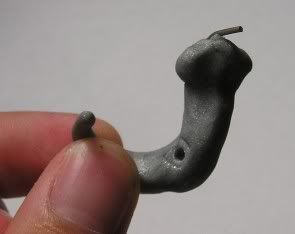
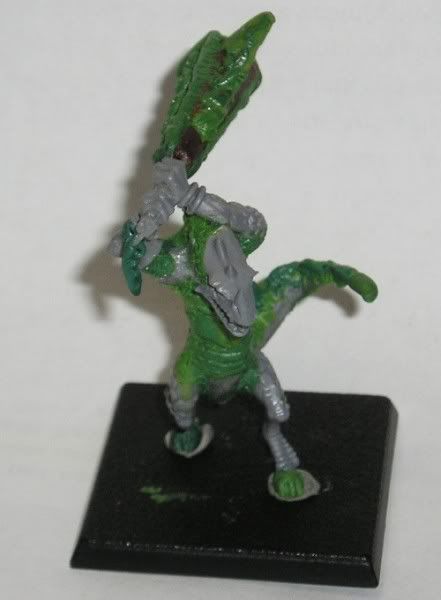
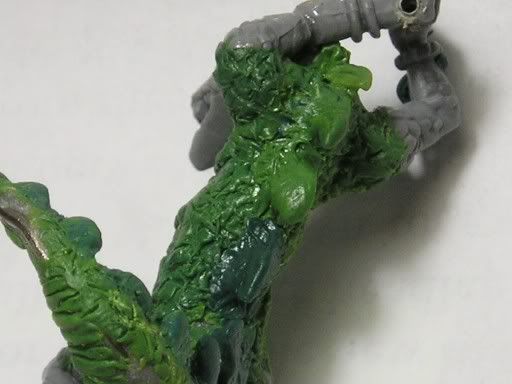
Now you get to undo all your hard work and start bending it again. Use a picture of a kroxigor for reference and try and create an armature of some kind. Make sure you leave about 6-8mm straight for the head. Bend the next part almost 90 degrees to it, then make a curve for the chest. At about 2.25cm of chest, I start bending the clip 90 degrees again to form a tail, which I curve to make look tail like.

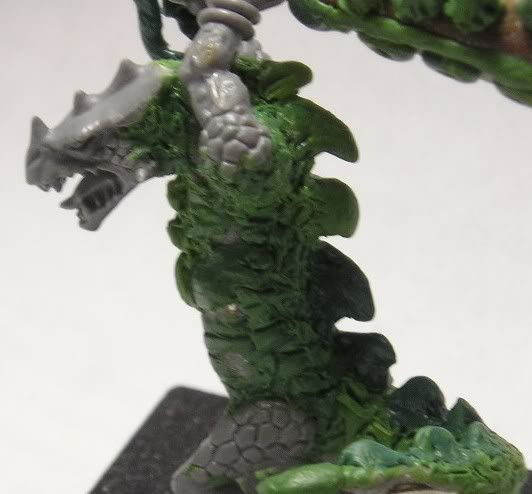
Clip off a head you like from the Saurus sprue, and trim its crest right back. Then clip off the right leg you want. Get the pin vice and drill a hole just big enough to fit a paperclip, into the back of the Saurus head. Don't go too far in or it'll come out the front of the head!
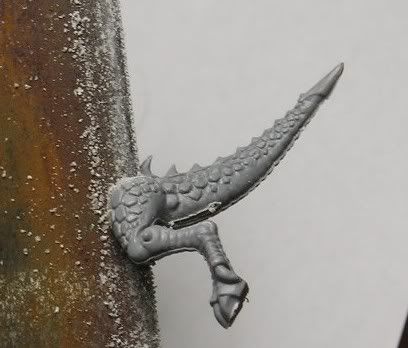
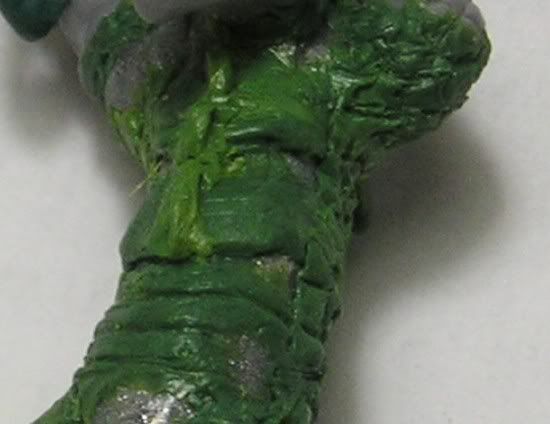
Now, you need to bulk it up a bit. Use some modeling putty or oven-bake clay (I used Sculpey) and make a wormlike body. Leave the area you set aside for the head free of putty. At this point I like to test fit the head, to get an idea of how big to make the body. Once I'm happy, I add on two small blobs to make the shoulder structures. Then I press the right leg into the krox where I want it to go as a finished product.
If you used ovenbake clay, get your parent's supervision out and bake it. If you used Milliput, just let it sit, but don't let it fall out of shape. You should end up with something like this:
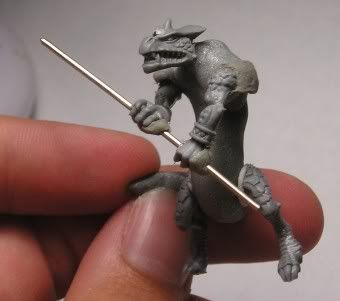
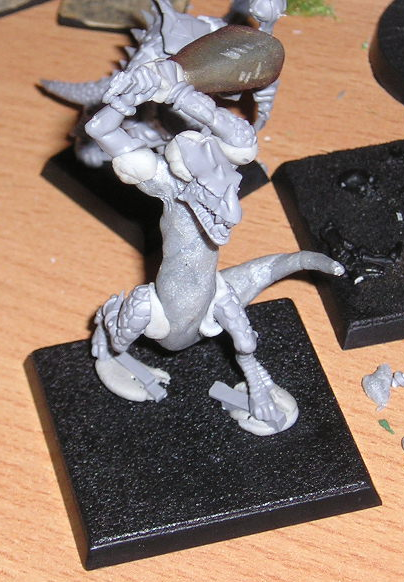
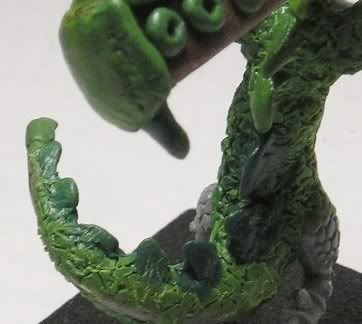
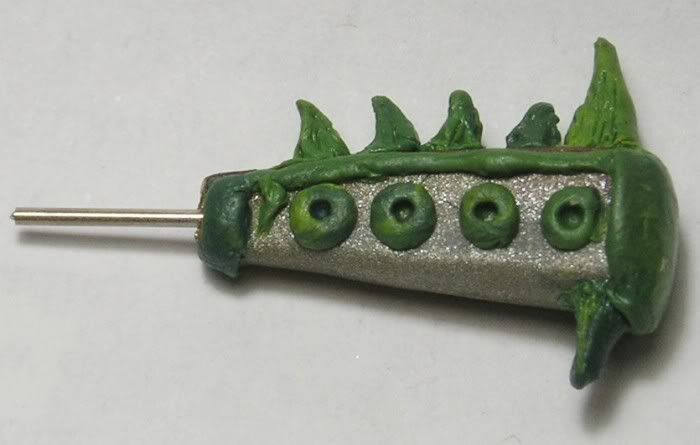
The next step is to prepare the arms and weapon. Get some idea of what kind of weapon you want for your kroxigor (it helps to have different weapons for each of them) and get started. I usually use a straightened paperclip as a core for my weapons, and use putty or clay to flesh them out. Clip off a right and left hand from the sprue, and carefully drill through them to fit a paperclip inside.
You may find that the arms don't fit on the body. That's okay. To lengthen the arms, carefully clip halfway through the elbow joint, bend it into position, then use plastic glue to stiffen it. Green Stuff can then be added later to just finish it off and cover the hole. If the arms still don't fit, don't fret. You can still add onto them when they get attached. For this Kroxigor, I've gone for a huge double-handed axe.
At this point, grab your handsaw, parents, and the body+left-leg from the sprue. (Hopefully your parents weren't on the sprue!) Cut through the body to disengage it from the leg. Basically you are amputating the Saurus.
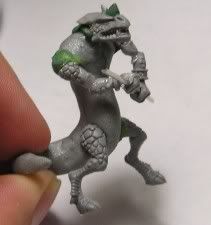
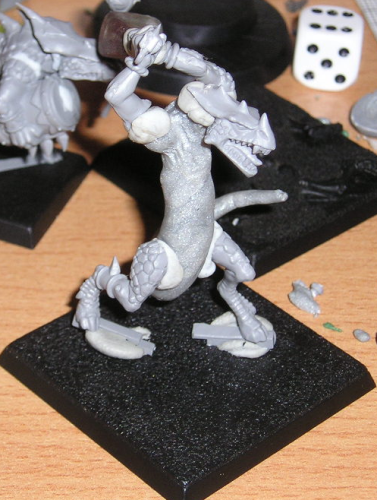
Now dry fit everything to make sure it looks right to you. This is what I call a 'grey'. It's a bunch of pieces bluetacked together.
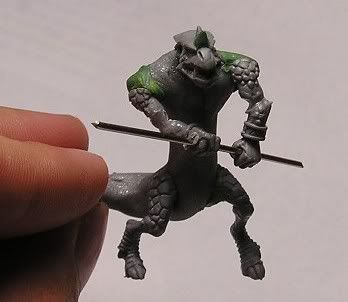
The last stage of
Developing the Structure is to seal the structure together. I find the strongest bond is to get a small blob of Green Stuff, paint both surfaces you wish to bond with Super Glue, then squish them together like bread around a Green Stuff Sandwich. Trim off the spare Green Stuff, though you shouldn't be using much at all. This is the final stage where you can make changes to the pose. After this all you have left is to detail.


