

That said, i'll probably be making this thread and adding to it over a couple of days, if you think something needs clearer explantation, i've missed something or there's something you want added please do PM me and let me know so i can change things. I will try to write for someone who's never used any image program before, but might still be guilty of assuming knowledge without realising it, so anyone picking up on that would be useful.
Framework:
1. Tools you need:
1.1 GIMP (a note on dockable dialogues)
1.2 A note on keyboard shortcuts. time saving marvels of the modern world
1.3 Hosting, photobucket
2. Creating a template:
2.1 Creating a new image
2.2 Creating transparent background
2.3 Creating a unit ('rectangle select' tool, 'fuzzy select' tool, delete shortcut, 'move tool')
2.4 Colouring a unit ('zoom' tool, 'colour selection dialogue', 'bucket fill' tool)
2.5 Labelling a unit ('text tool')
2.6 Resizing the image ('crop to selection')
2.7 Saving the image (file types)
3. Creating a map:
3.1 Opening an image in GIMP for first time
3.2 Pasting an Image (terrain piece) onto your map. ('floating selection', and converting into a layer. 'Edit layer attributes')
3,3 Moving a terrain piece/layer
3.4 Merging layers
4. Deploying/Placing units
4.1 Transfering unit from template to map
4.2 Advantages of transparency
5. Moving Units
5.1 Using layers and layer Opacity to move units
5.2 The Measure tool
5.3 The rotate tool
5.4 Cleaning up
5.4b Cleaning up sceney
6. Other WFO tasks
6.1 Removing casualties
6.2 Moving/deleting/ selecting awkward shapes ('paths tool' and anchor points)
Well you can see I've set myself a task here! PM me if you think something is missing.
========================================================================================================================================================
Hello there, so you want to play Warhammer Fantasy Online (known by the cool kids as 'WFO'), but you've never spent much time fiddling with digital images and it's all a bit confusing? Well, hopefully I can help. The first help I can give is to assure you that none of the following requires any special skills, or artistic ability. I had never used GIMP before starting playing WFO, and had only used photoshop a couple of times for sketching before that. But the simple tasks needed for WFO were easy enough to pick up with a bit of trail and error, so with some guidance I'm confident anyone can do it!
I should note here that, though I do use a graphics tablet for making things such as WFO scenery, For actually playing a game of WFO (making a map, making a template, moving units and removing casualties) I only ever use the mouse and keyboard, nothing else required.
First things first. You will need to download GIMP which can be found here:
http://www.gimp.org/
This tutorial will be based on v2.6 (the current version at time of writing), but having seen GIMP go through several updates with none of the core functions changing everything here should remain applicable.
You will also need somewhere to upload your images once you've created them, so that your opponents can see your moves as you trash them (or as you gloriously flee, if you play goblins). I've used 'photobucket' for several years now and never had any issues. But if you already have an account with an alternative (such as 'imageshack') it makes no difference. Photobucket can be found here:
http://photobucket.com/
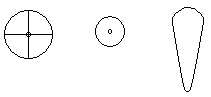
You will also need the following images. Save them somewhere by right-clicking and choosing 'save image/picture as...' (for IE/Firefox). You will use them a lot over your WFO life, so it's worth having them somewhere accessible.
 ,
,  ,
,  ,
, 
O.K let's get started. Before you can play a game of Warhammer you need an army so...
Creating your Army.
You need an image of the units in your army so you have something to copy when you want to deploy, move or modify units during the game. Your opponent often also needs to have access to an image of your army so that they can move your models... no this isn't cheating! An example might be if they charged a unit of your skirmishers, so once they make contact they can rank up the skirmishers against their frontage (saving you the trouble of doing it yourself I might add). This image is called your 'Template'
For this tutorial we will be using a small Empire army, consisting of a ranked unit, a skirmishing unit and a war-machine. The three units provide slightly different challenges when modifying your image, so we'll get a chance to look at all 3.
So here's my Empire list:
“Captain
10 Archers
20 Spearmen, Standard, Musician, Champion
Cannon”
Creating An Image.
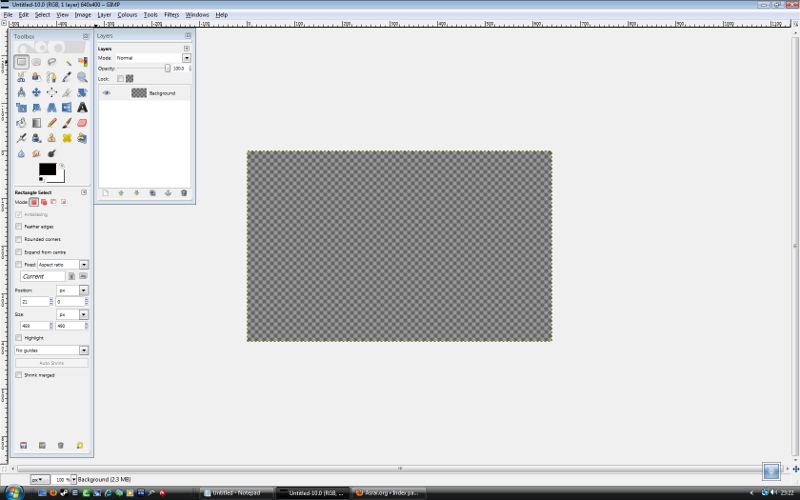
First open GIMP, you will be presented with a blank page with a 'Toolbox' and a 'Layers' box. These boxes are called 'Dialogues', if you ever accidentally close them or somehow lose them click “Ctrl-L' to bring back the layers window, or go 'windows->'dockable dialogues'->'layers' through the menus at the top of the screen. (For some reason I manage to lose windows all the time, I just can't resist clicking on red x's it seems).
1.1. Your screen will look like this:

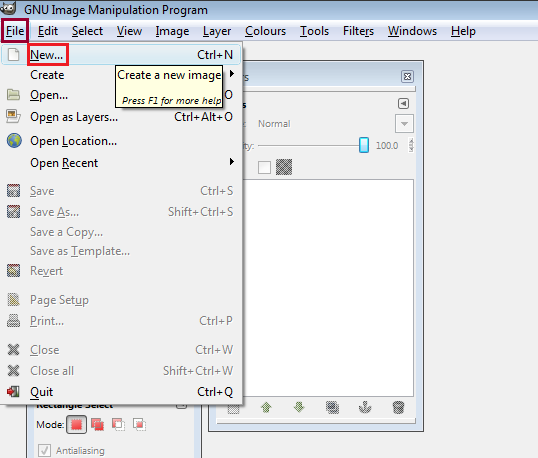
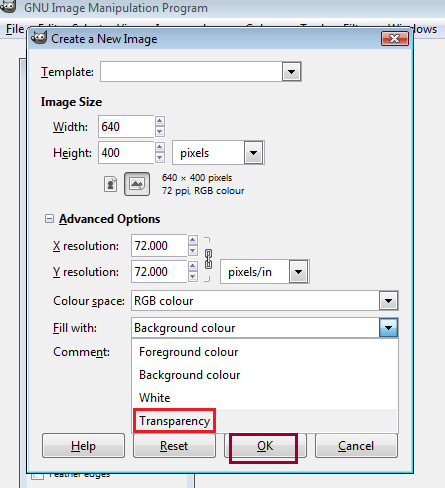
1.2. There is no document open at the moment, so the first thing to do is to create a new image. In the top menus go “File → new”
1.3. Then in the box that opens, click on the 'Advanced Options' option.
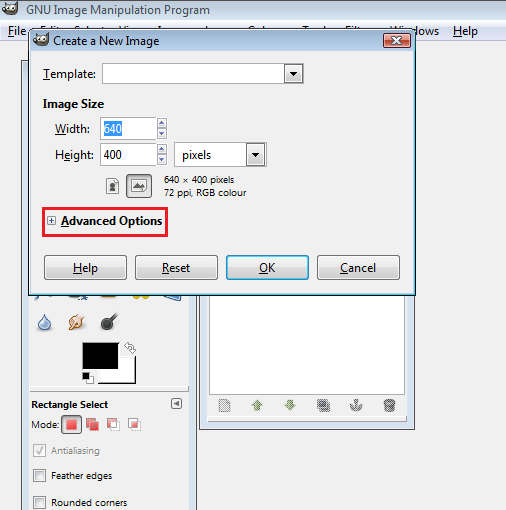
1.4. Go down to the 'Fill with:” box and select 'Transparency' and click ok.
1.5. You will now have a space covered in grey squares. These square represent an area that is 'transparent', when you post this image on a website (for example) any area that shows as grey squares in GIMP will show the background of the website. You should have something similar to this now:
Now with this image still open, find the army templates picture you saved earlier (the one with lots of blank black & and white templates of base sizes). Open this image in GIMP. To do this right-click on the file, if there is a 'Edit with GIMP' option, select that. If not select 'Open with...', click on 'choose default program' and search for GIMP and select it. You will now have your blank image and the unit templates both open in GIMP.
Creating A Unit.
First we're going to create the spearman unit. Select the 'rectangle select tool' in the toolbox, which looks like
 . On the blank template image, left-click and drag so that there is a box surrounding the row of 5x20mm bases. Then copy the area you have selected by either hitting 'ctrl-c' or by right-clicking on the image and selecting 'edit'->'copy'. Go to your blank transparent image by clicking anywhere on it(the one full of grey boxes) and paste your selection with 'ctrl-v'. Your selection of 5 bases will appear in the centre of your blank image and can be moved around using the 'move tool'
  .
.You will have something that looks like this:

Now we need to get rid of that unwanted white area around our models, fortunately GIMP has a button that lets us select this area with the click of a button. The 'fuzzy select' tool allows you to select an entire area of the same colour, in this case the white area. To use this tool you must first unselect the item you just pasted (in this case the 5x25mm bases), just select the
and click once anywhere outside the selected area to clear your selection. Now select the fuzzy select tool  and click once anywhere on the white area you want to remove. You will notice the white area is now surrounded by a dotted line, meaning all of the white has been selected. Simply hit 'Ctrl-x' to delete the area, job done! All the spare area you selected has been neatly removed.
So now you have 5 guys, but each unit needs some colour so that players can tell them apart, so it's time for some colouring in.
First pick a colour, these guys are from altdorf so it will be red and blue. Click on the 'foreground/background' colour selector found halfway down the toolbox
 and in the window it opens use the slider to select a colour (you can fine tune and get finer shades of these colours in the large box on the left), then hit 'OK':
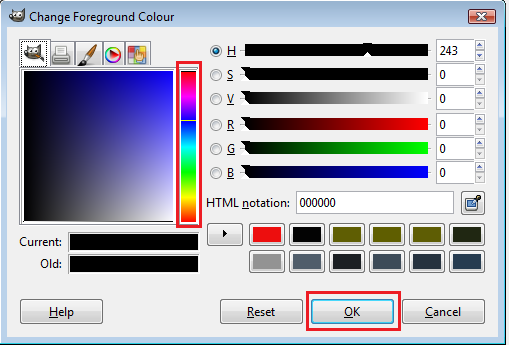
In your tool box, the
icon will now show the colour you picked. Before you can fill in the colour you need to deselect your image again, using the tool and clicking once anywhere outside the selected area as before. Click the 'bucket fill' tool in the toolbox  and then click on an area you want to colour to fill it in with the colour selected. You will notice it fills all the area of the same colour until it meets another colour. A very quick and easy way of colouring in areas. Do this for each guy and then go back and change colour to red and fill in the other blank space you will have:
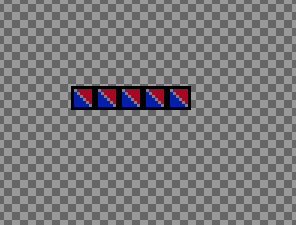
So, you have 5 guys done and you have 20 in the unit. Instead of repeated all the above another 3 times, just use the rectangle select tool
to select all 5 guys, copy them with 'Ctrl-C' and paste them again with 'ctrl-v'. Tadaa! You now have 10 guys done. Use the move tool to position these 5 guys as a 2nd rank, and repeat until you have all 20 guys.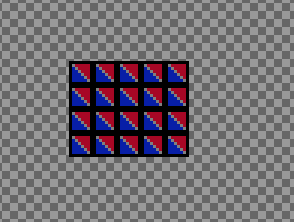
You might have noticed, that by setting your background as transparent at the beginning you've avoided having to remove the excess white (or be very precise with your selecting) each time you copy and paste. This saves a bit of time now while making your template, but saves loads of hassle once you're actually playing the game.